The goal here is simple and straightforward: to create clear, even layers of glycerin soap without any mixing or gaps . Follow these steps to achieve a clean, professional result from the very first try.
Why choose layers?
Layering gives a modern look and allows for color gradients (ombre), or a combination of transparent and white, or the insertion of "confetti" pieces inside a transparent window—all of which raise the product's visual and marketing value.
Required tools
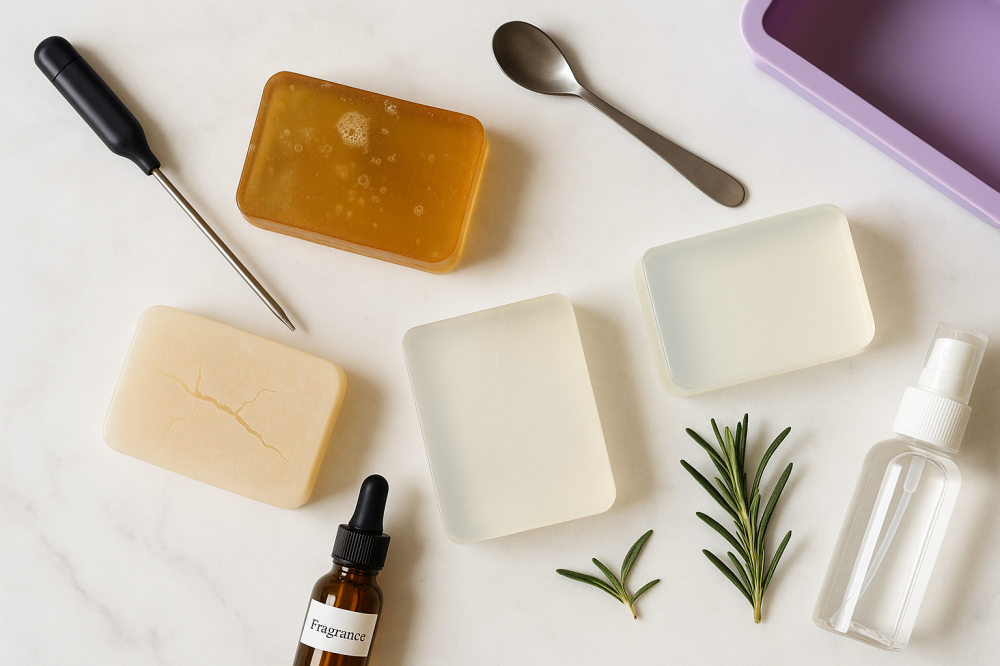
- Soluble and pourable glycerin soap base (transparent and/or white).
- A water bath or microwave for intermittent heating.
- Digital scale + my kitchen thermometer.
- Clean and dry silicone molds.
- 70% medical alcohol spray (for bridging layers and bursting bubbles).
- Dyes specifically for soap (transparent ones are preferred for glass layers).
- Essential oils that are safe for the skin.
- Heat shrink wrap or cellophane for packaging.
Rules for the success of classes (before we begin)
- Pouring temperature: Maintain approximately 55–60°C for each layer; excessive heat will melt the previous layer, and excessive cold will prevent them from sticking.
- Spray alcohol between layers: A light spray of 70% medical alcohol on the surface of the hardened layer before pouring the next one—this “bridges” the adhesion and prevents separation.
- Waiting time: Allow each layer to surface-set (usually 10–20 minutes) until a firm crust forms, but do not wait for hours so that the layers do not lose their ability to unite.
- Pouring height: Pour from close to the surface and slowly to avoid penetrating the previous layer or introducing bubbles.
- Fragrance and color should be used sparingly: fragrance 1–2% , and color added gradually. Excessive use will cloud the transparency and affect the adhesion of the layers.
The basic step-by-step method
- Prepare the base: Cut into cubes and melt gently (60–75°C) then reduce to 55–60°C .
- Color and scent the first layer by stirring gently.
- Pour the first layer to a low height. Spray the surface with alcohol to burst any bubbles.
- Wait for a firm crust to form (a light touch with the tip of your finger should not penetrate it).
- Spray the alcohol onto the surface just before the next layer.
- Prepare the second layer (make sure its temperature does not exceed 60°C) then pour it slowly over the first.
- Repeat until you have completed all the layers.
- Leave the mold to cool in an air-conditioned room until it is completely solid, then unwrap and wrap immediately to avoid “sweating”.
Easy and beautiful design ideas
- Transparent + white alternating: Alternating a transparent strip then a white one gives a clean and luxurious contrast.
- Ombre (one-color gradient): Start with a slightly dark shade and gradually lighten the color in each layer.
- Transparent window: a thin white base layer, then a transparent layer incorporating colored cutouts, then a thin white seal.
- Diagonal line: Tilt the mold slightly when pouring the first layer, let it set, return it to its normal position and continue with the layers.
- Multiple thin strips: very thin layers to give closely spaced lines—pay attention to the casting temperature so that the strips do not melt.
How do you maintain clear boundaries between layers?
- Keep each layer at a temperature close to 55–60°C .
- Avoid pouring too quickly; start at the edge of the mold and then widen the pour.
- Do not shake the mold vigorously after pouring; only a light shake to level the surface.
Solve common problems (quickly)
- Mixing of layers or melting of the previous one: the temperature of the new layer is high; reduce it to 55–60°C and wait for a stronger crust before pouring.
- Layer separation later: Alcohol was not sprayed between layers or the time interval was too long; always spray alcohol and pour the next one immediately after spraying.
- Bubbles at the border: Pour from close up, then spray with alcohol immediately, and stir the mixture gently before pouring.
- Cloudiness in transparent: excessive color or high heat; dilute the color and dissolve gently and do not boil the base.
- Uneven surface: rapid airflow or cooling; cool in a still, air-conditioned room away from direct fans.
N
Color and fragrance tips with layering
- Use transparent dyes specifically designed for soap for the glass layers, and keep them light to allow light to pass through.
- Perfume at 55–60°C and at a concentration of 1–2% so as not to loosen or cloud the base.
- For ombré: Divide the quantity into equal parts, and gradually mix each part with a different amount of color before pouring.
After completion: Packaging and storage
- Wrap the pieces directly in heat shrink wrap or airtight cellophane to reduce “sweating”.
- Store it in a cool, dry place (approximately 20–24°C) away from sunlight.
Summary
Consistent layers equal heat control + alcohol spray between layers + gentle pouring . With each layer, your expertise will grow, and you'll end up with a clean-edged, glossy piece that's worth photographing and selling.